Get the foundation right, or don’t do it. That’s true when constructing a building and when performing the kettlebell movements. Check out how to learn the kettlebell swing from the ground up in this kettlebell form check.
That saying is incredibly important for dynamic exercises like the kettlebell swing. Learning how to perform the kettlebell swing from the ground up is like laying your own foundation. In this episode of Kettlebell Form Check we dig into the KB swing.
Kettlebell Form Check of KB Swing
Kettlebell Swing User Submission
This episode comes from Abhishek who asked for some help with his form and was complaining of lower back pain. When we reviewed his submission we could see why he was experiencing pain. We’re guessing that he, could be one of us … you know … a cube dweller.
Much of the issue we see in his swing stem from extreme tightness both in the hips and shoulders. We’ll start with the hips to combat the tension most likely generated from years as a cube dweller.
Psoas – The Fillet Mignon of the Human Being
I enjoy turning to Mobility WOD, Mobility Workout of the Day, by Kelly Starrett. He continues to come up with great short video posts to address mobility issues. Here are two clips from Kelly to help Abhishek regain some hip mobility. In one of these clips Kelly calls the psoas muscle the fillet mignon of the human body. The psoas is a powerful muscle that gets completely messed up by our cube dwelling lifestyle; sit down and add in a double portion of stress and BAM over-tight psoas.
In Abhishek’s video we see how much tightness he is carrying in his swing. This has most likely developed over years and won’t free up with some simple stretching and mobility drills; it will take time and possibly some help from a soft tissue specialist. These drills will help, so free your hips.
The Steps to Improved Hip Mobility
- Pancake the Hips – Grab a hard ball, such as a lacrosse ball, and perform some myofascial release by working all around the hip bone. Set the ball down on the ground, then sit on it with one butt cheek. Shift your weight around, rolling the ball along the hip bone. Take time to pause when you feel tension (slight pain) and hold for 20-30 seconds waiting for the tension to release. As you explore the hips rotate your leg in and out allowing the pressure from the ball hit different regions of the muscles.
- Lay On It – Flip over, in the privacy of your own home, and lay on the ball. This movement will look very odd, so I don’t recommend doing it with an audience at all. Find some privacy for you and the lacrosse ball. Kelly suggests starting with the ball just off to one side of your belly button, lay down onto it, then shift your weight rolling the ball outward. This will apply pressure to the front sides of the psoas muscle.
- Criss-Cross-Lean – Sit upright, then cross your legs with one leg on top the other. Your top foot should be up close to your hips. Then lean. Criss-cross and lean. Start first by leaning slightly forward feeling the stretch in your hip muscles where you just rolled. Then reach up and over with the arm near your top foot (see video) and lean to the side. Your top foot will help apply pressure down on your hip and focus the stretch. Take time and hang.
Take time to do all three steps on each side.
Video From MobilityWOD: Psoas and Hips
High Hip Mobility
Here is another quick mobility exercise to spend five minutes on each side of the hips working to open up the high-side of the hips. Start with a chair or bench near you to your left, with a wall just behind. Kneel down with your right foot up on the wall so the top side of your foot is against the wall and your knee near the corner of the wall and the floor; your shin should be parallel to the wall. (see video below). You can lean forward to open the hips, but then reach up overhead with your right arm and lean up, back, and to the left. Feel the stretch through your psoas and your hips. Hold for five minutes each side.
Video From MobilityWOD: High Hip Mobility
Learn the Kettlebell Swing From the Gound Up
Once the hip is free to move, then we can start laying the foundation and learning the kettlebell swing from the ground up. We’ll walk through this in three steps: stance, hips, and shoulders.
Stance
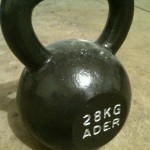
To start the kettlebell swing place the kettlebell on the ground in front of you with the handle going across your body. Start with your feet roughly shoulder width apart, then check with you hands. We want to ensure there is enough room for the kettlebell to swing. Make fists
Hip Snap
Shoulders
How’s Your Swing?


About Troy Pesola
Troy is the founder of Cube.Dweller.Fitness. He's an innovation catalyst in several areas of life including business, marketing, and process improvement. Outside of work he's actively involved in fitness, health, and living vibrantly in the Rocky Mountains of Colorado.
Want to discuss? Join the conversation CubeDwellerFitness's Facebook Page.